Monday, June 22, 2015

Bella Blue #2

I made a Bella Handbag for myself in blue. I wanted a casual bag that would go with more things, since most of my bags are made in bright colors, so I opted for a more plain gingham look in blue. Looks great with blue jeans! This is a ChrisW Design bag and she is retiring this bag at the end of June (I think) which is only a few days away. So if you want the pattern you better get it now. I was making this Bella as part of a sew along on Facebook and so now that it's done I will show you the finished bag. This bag has 9 pockets in all, including the pen pocket, but you can leave some pockets off if you want to.
Ta-da, isn't she pretty? I chose to braid the straps and I like how they look and feel when I am carrying Bella too.
Side pockets with elastic at the top and snaps on the bag to cinch it in too.
Back of the bag has a zipper. 
Handmade zipper pull that I did make too.
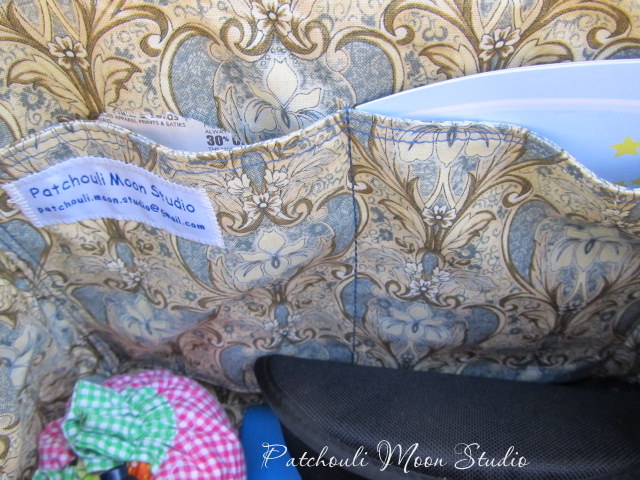
See all my junk fits inside nicely.
Two slip pockets on one side and a pen pocket that you can see on the photo above all the way to the right.
A zippered pocket with a slip pocket behind it.
A triple stacked button.
  Pin It Now!

Monday, June 15, 2015

My Block for the Quilt Block Contest

Several months ago I wrote about the annual QBC (Quilt Block Contest) where you receive some fabrics and create a quilt block and then the quilt blocks that are entered are judged by the teachers who are teaching during the week before the Sisters (Oregon) annual Outdoor Quilt Show. All of the quilt blocks are displayed at the quilt show and the winning blocks will have a ribbon pinned to them. This year's fabric line was designed by Tula Pink and Tula is also one of the teachers. You can see the 7 fabrics here.

I had a hard time trying to figure out what to create. These fabrics were a challenge to me because they were all nearly the same tone and nothing really popped. I decided to do something a bit abstract. I used a flexible curved ruler to draw some shapes and fused the shapes onto the gray background fabric. I thought it would be fun to use a lot of my decorative machine stitches. While I like these stitches, the only one that really showed up was the satin stitch design and in hind site I really should have used more dark colored embroidery threads to make the stitches pop more and to give the block some dark tones, which it lacked.

The deadline for turning in the blocks is today, June 15. The judging will be about 5 days before the quilt show in July. The top winner will receive $50, some fabric to complete the quilt top, and a number of the the non-winning blocks. There will be a few honorable mention winners, who will receive the same things, except no money. I am not sure how many blocks were entered this year, so the number of blocks the winners will receive will depend on the number of blocks received overall and then they divide up the non-winning blocks to give to the winners. Have to wait until July to see what top blocks won.

Here is the block I entered for this year's contest:
My block entry was abstract.
I used decorative machine stitches and some hand embroidery stitches too.
I added several buttons for embellishment.
The turquoise satin stitch pops the most because it's darker and a thicker stitch than the other stitches. I should have used more satin stitches like this one.
Using the alphabet on my sewing machine, I embroidered :Sisters" on one corner of the block.
On the opposite corner of the block, I machine embroidered "2015".
  Pin It Now!

Sunday, June 14, 2015

Feather and Fan Knit Throw

I wanted to use up my worsted weight acrylic yarn, so I decided to knit a wavy blanket and change colors every few rows. I never know for sure how far my skeins of yarn will take me. This turned out as a nice size baby blanket. The pattern is a free pattern called the Feather and Fan Throw on Ravelry. It's an easy pattern to knit too.
Used up yarns of purple, pink, white, blue and a variegated yarn of purple, pink and white.
Oops I see a hair on the blanket there, lol!!!
  Pin It Now!

Thursday, June 11, 2015

Girlfriend Bag

I tested a bag for a new-to-me designer, Imaz of ImazzPatterns. This mini bag was fun to sew and has a hidden pocket in the middle, a zippered pocket, a flap, a large slip pocket and if you want to you can add an additional zippered pocket. I opted not to add the additional pocket. You can make the strap adjustable to wear across your body or shorten it to wear on your shoulder or even use the bag as a clutch. I made my strap long enough to wear across the body, but non-adjustable. You could even make a wrist strap for it if you want to. It's a perfect size for a young girl, teen, or adult when you want to carry just a few items with you.

The instructions are very good and there are lots of photos so you can see how things are supposed to be looking too. I chose bright fun spring colored fabric to make my version. You can have fun mixing and matching fabrics or use all one fabric. If you would like to make this bag too, you can find the Girlfriend Bag pattern on Craftsy here.

I used a patchwork fabric and a pink polka dot fabric as the lining and accent fabric.
A double stacked button I added as a nice accent on the flap.
I made a zipper pull for the zippered pocket.
Side view shows the two pockets that are sewn together.
The zippered pocket and the large slip pocket are under the flap.
Here I unzipped the pocket.
Between the 2 pockets is a smaller hidden pocket.
The back of the bag.

  Pin It Now!

Sunday, June 7, 2015

Dakota Tablet~Nook Clutch

I had knit a cover for my Nook a while back, but I wanted something more cushioned and easier to take the Nook in an out of. The knit cover is like putting a sweater on someone else, so you have to fiddle more with getting it on. I found lots of tablet and iPad patterns/tutorials online for free and I know I could have designed an easy pattern myself too, but after looking around I decided to try the Dakota Tablet Clutch by Swoon. It's a free pattern. Since my Nook was a bit smaller than the clutch instructions, and the instructions even tell you to reduce the pattern size if your tablet is smaller, I did reduce the pattern to 80%. I wanted to make sure I had enough wiggle room and so I didn't want to go smaller than 80%.

A few of the pattern pieces didn't print completely though. They were cut off and even though you were supposed to tape some sections together, they didn't match up correctly, so I had to improvise. I added the decorative strip to the clutch, although in hind site the strip on the back seems pointless as it really doesn't show, but I liked it for the front. If I ever make another one, I would only add the front strip. I think I would also add a pocket on the back for storing my cord if I were to make it again. All in all I do like how this turned out and my Nook is happy in her own pretty clutch.

Oh and the pattern calls for using a magnetic snap, but in a previous post about testing a wallet for Christine, I explained I couldn't use my twist lock closures because they were missing the rivet parts. Well I decided I would take a chance and test using the twist lock closure on this clutch. I figured I could sew the twist part to the bag like I would sew those old snaps that have several holes. It worked and since this was my first time installing a twist lock I learned a few things. I don't think I will use the twist lock where I have Peltex because it's too thick. I will try a twist lock with fleece or foam stabilizer instead in the future.


The back of the clutch and the handle. The accent strip is rather pointless to add here as it's not seen much.

Lacking rivets, I sewed the twist lock part in place with embroidery floss and lots of stitches to make sure it was secured in place. The stitching doesn't show at all when the twist lock is closed.
Pin It Now!

Monday, June 1, 2015

Penny Inn Wallet

The Penny Inn Wallet, designed by Christine of ChrisW Designs, is the Bag-of-the-Month Club bag for June and the final bag of the club for this year. While this is a wallet and not exactly a bag, it is packed full of pockets and you can add a wrist strap or a longer across-the-body strap too, if desired. I was one of the testers of this wallet, so that's why I have it finished already. Believe me this wallet took longer to make than most of the other bags I made. Christine has very detailed instructions as usual and so while this wallet may look very advanced, if you follow each step, you will see how several small pieces of fabric suddenly transforms into a lovely wallet.

I didn't have the flip closure and was going to use a twist lock closure I purchased months ago; but there was obviously something missing because I couldn't figure out how to attach the one part. There were no screws or rivets. When I contacted the seller she kept showing me photos and didn't understand me. So I will need to figure out an alternative on how to make them usable, if they indeed can be used. Otherwise it was a waste of money. I got them for a great deal and purchased quite a few of them too, thinking I would love using them. Since I hadn't used them before I didn't look closely enough at the photos, or I wouldn't have purchased them. Oh well live and learn. So I used a sew-on snap closure instead.

This wallet measures when closed: 8 ¼" wide x 4 3/8" high x 1 ½" deep.

Here is the Penny Inn Wallet I made~

I added the wrist strap to my wallet.

Because I used a magnetic snap, you can see the bump of it in the center there. I wanted to use the twist lock closure I had, but it was missing parts.

The back of the wallet.

The back of the wallet.


These are the parts of the twist lock closure I wanted to use. But nothing came with it to insert the twist piece on the left with the 2 holes. So I need to experiment and see if I can find rivets or screws or even sew it in place to see if it will work. No wonder I got a good prince on these as they were missing parts!

I sewed a large snap to close the wallet instead of using the flip lock closure.

There are oodles of credit card pockets.

More credit card pockets here and  three zippered pockets in all. Plus more slip pockets too.
  

Pin It Now!
Related Posts Plugin for WordPress, Blogger...